Here are 10 quick checks you can undertake on aspects of your website that may be affecting your website’s presence in search engine results. All the tools that I suggest in this guide are free, easy to use, easy to understand and, most importantly, actionable.
The areas this SEO health check covers and the tools I recommend you use are:
- Title tags and meta descriptions – using the free MozBar and Google Search Console.
- On-page copy – using MozBar.
- Duplicate content – using Google Search Console.
- Page speed – Google PageSpeedInsights and Pingdom Tools.
- Mobile friendliness – with Google Mobile-Friendly Test.
- Image optimisation – with Screaming Frog SEO Spider.
- Broken pages – with Google Search Console.
- IP Location – with IP Location.
- HTTP/HTTPS
- Robots file – with Google Search Console
A basic knowledge of HTML tags is assumed, but if you need guidance, or for reference, use w3schools.com.
1. Check your title tags and meta descriptions
Title tags are important because they essentially tell search engines and people alike what the theme of that page will be, help Google decide the page relevancy to a user’s search and act as a ranking factor.
Meta descriptions on the other hand act as a brief summary of what that page contains and are not a ranking factor but can reinforce a decision to click on your URL.
What should you be aiming for?
- Avoid duplication – each page should be unique therefore each title tag and description should be too.
- Include your keyword (at this point this is the page theme as search engines are very intuitive nowadays) in your title tag and your description.
- Aim for your title and description to be 55 and 155 characters or less respectively and include your company name as such: “Page theme/keyword | Company Name”.
To do an SEO health check on your title tags and descriptions, a page at a time, download the MozBar and click on the page analysis button. This will show you the information on title tags and meta descriptions for that page.
If you have a website with a fair number of pages you can use Google Search Console (previously called Webmaster Tools) to find a summary of your site’s content. Doing this will allow you to identify any elements that are duplicated or are too long or too short.
2. Check your on-page copy
Headings (H1, H2s etc), alt tags and keyword density should all be considered but this shouldn’t be at the expense of how engaging and useful your content is. There’s no point getting content found if it sounds spammy and repetitive.
What should you be aiming for?
- Word count – as a guide aim for 300+ words as a minimum.
- Keyword density – avoid sounding spammy but use your keyword and don’t be afraid of using synonyms (Google’s use of Latent Symantic Indexing means that it knows the general context of a page without you having to repeat your keywords).
- Consider the use of keywords in your headings.
- Use pictures – pictures are great at explaining things quickly and alt text helps describe the pictures to visually impaired customers.
Using the MozBar, pick the analyse page option. The page analysis button will let you check all of the on page factors that go into making a web page relevant for a particular query.
3. Check for duplicate content
Google doesn’t want multiple copies of the same information as they serve little purpose for a user’s experience. It also looks as though you are trying to spam the search results by adding loads of pages on the same topic. You can do a simple check to see if Google thinks you have duplicate content on your site using a command in the Google search box.
Type “site:yourdomainname.com”. Then navigate to the last page of the results and see what message you get. If you see the following message you may have a duplicate content issue that you need to look at:
In order to show you the most relevant results, we have omitted some entries very similar to the 282 already displayed.
If you like, you can repeat the search with the omitted results included.
Having some pages omitted is to be expected, especially on a large site. However, if you are experiencing issues getting pages indexed that you think should be indexed this could point to the issue. For pages that are duplicated due to filters (for instance search results on ecommerce sites) use a canonical tag to point to the main page. If, conversely, you have written a load of blogs on the same topic, make sure to see which page ranks best, has the most traffic and authority – collate all the copy from all other pages that is useful onto that page and then permanently redirect all other versions to the main one that will remain.
4. Check page loading times
Google wants to provide users with content that provides relevant answers quickly. That means speed. We’ve all been on websites that take an age to load and our response was likely to leave the page and go elsewhere. An increase in mobile usage means that page load speed has become more of a ranking factor and slow load times should not be ignored.
There are loads of free tools for checking the speed of your site but you might as well go to the horse’s mouth. Use the Google PageSpeedInsights or Pingdom Tools and you will get a list of suggestions for your developer. While the tool itself is free, asking your developer to make the changes may not be. However, if the site speed is dreadful (say 10/100), I’d suggest that a web development company should be fixing this for free as they built a site that is not up to scratch.
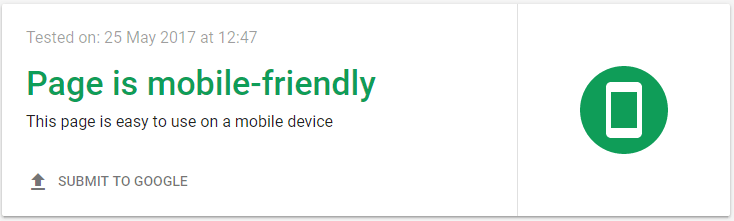
5. Check if your site is mobile friendly
If you compare how many times you used your phone in a day to how many times you use your desktop you wouldn’t be surprised to learn that having a mobile-friendly website is a ranking factor. Google wants to promote those sites that cater for users on mobile devices, especially now that they have a mobile first index. So if your site isn’t mobile friendly yet, change that. There is a very quick and simple test you can run through Google’s own Mobile-Friendly Test.
This is a quick way to identify what page resources Google can load and what it cannot, ie what Google can “see”. This can highlight issues that can be addressed with your web developer.
6. Check the size of your images
There’s no excuse for having huge image files on your site because there are so many free tools that will allow you to reduce the size and compress files without affecting image quality too much. It is a fine balance though. You need a good enough quality file to be useful to the user without them having to use all their data just to see a banner image.
Firstly, you need to crawl your site and look for files that are too big. You can do this with one of my favourite tools called Screaming Frog (free for up to 500 URLs).
Download the free version of Screaming Frog and make sure you select “check images” and the mode is on “spider”.
Once that is done simply enter your website URL and click start. Once the crawl is finished you will be able to see all the images that Google can crawl on your site. Scroll along to image size and order by biggest size. If you have some large image files that you think you can reduce in size and compress get it sorted!
There are loads of free tools you can use to edit images and compress image files. The two I use are:
- image editor resizeimage.net
- image compressor tinypng.com
7. Check broken pages
It’s important to keep a check on pages that were once live and now are not. Pages that break (ie that give a 404 Page Not Found error) can occur for many reasons like accidental deletion or URL change. Although having 404 pages isn’t of itself a ranking factor, the pages could still be indexed, generate traffic and have inbound links. If you lose these pages you lose the traffic and any value the link was passing to your website. Therefore it’s always best practice to review your broken pages and redirect to a relevant page or simply fix them (unless they are causing duplicate content issues as mentioned above).
To identify broken pages you will need to log on to your Google Search Console and navigate to Crawl > Crawl Errors > “Not Found” tab. Here you will see a list of all the pages that Google has crawled which are providing a server response of 404.
You can then highlight all of these pages and download them to a file. There are tools you can use to further qualify all these URLs to see if they are worth redirecting but at this stage we just want to perform an SEO health check and not a full in-depth audit. Therefore do a visual check of all the URLs and check if you see any URLs that really should be working. Make a list and speak to your web developer, or if you have access, update your redirect list.
8. Check IP location
Although many websites use servers in foreign locations, there are still many people who believe that the location of your server can have an effect on your local search visibility. So if your website is hosted in Germany, Google is more likely to think that your website is more useful to German users than if it is in York in England, for example. It’s not going to be a game changer if your site is hosted elsewhere, as Google takes into account many other variables like your Top Level Domain (eg .co.uk) or which territory you may have specified as being most relevant in Search Console; but if your server is located very far from the user, this could affect the speed at which the site loads for that user. So if you know that you want people in the UK to view your site and other territories are not so important to you, it stands to reason to host your site in the UK.
The main thing is that your website is hosted in a way that gives your users fast access to it. A way to do that is to make sure it’s hosted locally.
You can check the location of your IP by going to a website that does this automatically, for example iplocation.net.
9. HTTP vs HTTPS
If you see an HTTPS before your domain name that means your website is secure, using SSL to move data. In other words, the data is encrypted and more secure than HTTP – extremely important for users, especially if they are adding payment details onto your site. As this provides more security for the user, Google is more likely to promote a site that uses HTTPS above one that uses HTTP.
If your website doesn’t use HTTPS, don’t panic. It may be that there’s no business case for your website to change over to HTTPS. The acid test is to ask yourself “if I was a customer coming to my website, would I want any data I entered to be encrypted and secure? And do I want them to be shown a sign that says ‘site not secure’?” Either way, I’d recommend making the move to HTTPS.
Google certainly seems to agree, and because of this HTTPS is fast becoming an expectation of many websites. Some browsers even warn users if the site they are entering is not on HTTPS.
10. Check your robots.txt file
Robots.txt is a file that acts as a map for Google and other bots. It tells Google how to crawl your website, what pages to crawl and what pages not to crawl and index, as well as the location of your sitemap. Google ideally wants to access everything so it can choose what is and isn’t relevant, but you may decide that certain areas of your site should be off limits to Google, for example client login pages. By adding a snippet of code to this file you can tell Google not to crawl this area.
In the below example Hallam is requesting any URLs starting /events-calendar/ to not be crawled:
User-agent: *
Sitemap: https://www.hallaminternet.com/sitemap.xml
Disallow: /events-calendar/
This file is important! Essentially, what you are doing is allowing or restricting access to the pages on your website. It is easy to accidentally write a snippet of code which tells Google not to crawl the entire site (we have seen this before).
If you have a robots.txt file it should be located on the root of your domain for example “www.example.com/robots.txt”. You can easily check this file by going to Search Console > Crawl > “robots.txt Tester”.
This will show you if there is a robots.txt file and if there are any suggestions for improvements. If you are in doubt as to whether a page is accessible you will also be able to type in the URL to see if it’s blocked or not.
So there you have it: a cheap and cheerful website SEO health check!
Related articles
Why implement https? https://bit.ly/INL1709casalis
When and how to use 301 redirects https://bit.ly/INL1805ryan
Eleanor Reynolds has over 6 years experience in digital marketing and is a senior owned media consultant at Hallam Internet. Email eleanor.reynolds@hallam.co.uk. Twitter @HallamInternet.